This guide will walk you through the process of setting up a campaign account step by step. Follow these instructions to create an account on https://ads.turnitbluedigital.com/ and start running ads for your campaign.
Step 1: Navigate to the Account Setup Page
Go to https://ads.turnitbluedigital.com/signup or go to https://ads.turnitbluedigital.com/ and click "Request an account."
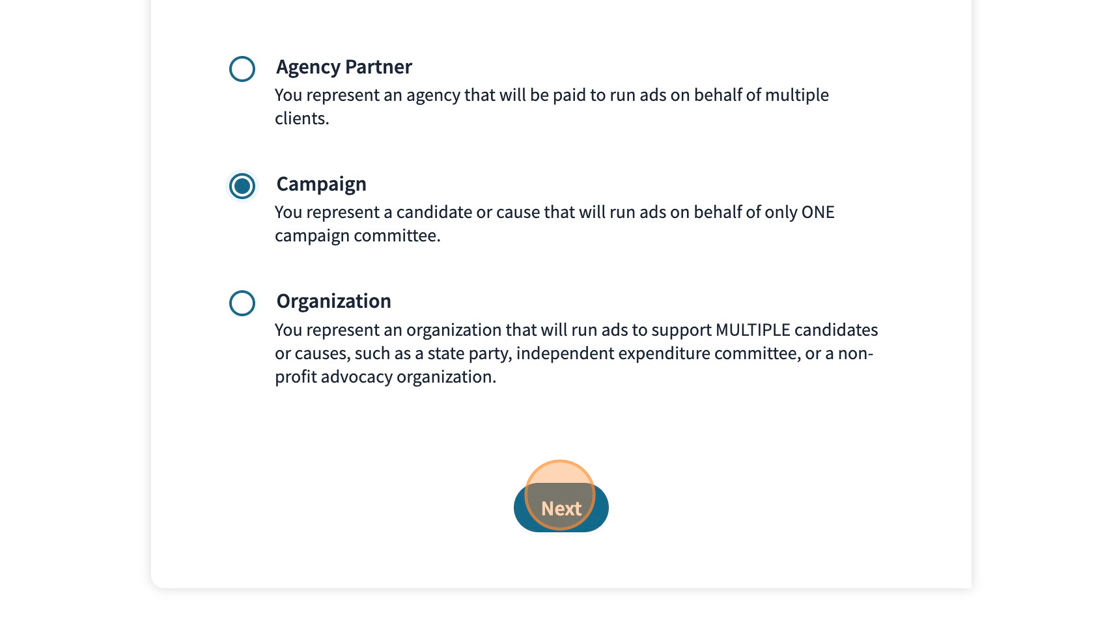
Step 2: Choose Account Type
- Click the "Campaign" field if you represent a candidate or cause for only ONE campaign committee.
- Click the "Organization" field if you represent an Organization or PAC that may run ads on behalf of multiple candidates or causes.
- Click the "Agency Partner" field If you are a business or consultant that will run ads on behalf of multiple clients.
- If you have more questions about which account type is right for you, you can read more about each type here:
- When you have chosen your account type, click "Next" to move on to the next screen.
Step 3: Tell us about your campaign
Click the "Name" field and enter the name of your campaign, agency, or organization. If you are a campaign committee or political organization, type the official name of your committee you have registered with the FEC or with your local reporting agency.
Then click the "Website" field and enter the domain of your website, including http:// or https://. The website domain you use here must match the domain attached to the email you use in the next step.
Click "Next" to move to the next screen.

Step 4: Enter Your Email
Click the "Domain-Linked Email Address" field and enter the email address you use linked to your website you used in the previous screen. For example, if your domain name is turnitbluedigital.com, then your domain-linked email address could be info@turnitbluedigital.com. You are not permitted to use Gmail or other services that are not linked to your domain name.
If you do not have a domain-linked email or have questions about domain-linked email addresses, learn more here:
Click "Next" to move to the next screen.

Step 5: Email Verification
Once you have entered all of your information, you will receive a pop-up notification like the one below. Click "Okay" to close the pop-up box, then navigate to the inbox for your email address you entered in Step 4 to obtain your verification code.
Enter the six-digit code to verify you have access to the email address associated with your account.
Click "Next" to move on to the next screen.

Step 6: User Information
Click the "First Name" field to enter your first name, then navigate through the information boxes to enter your last name, phone number, and time zone associated with your account.
If you are signing up for a campaign account, enter the "Campaign Type" most closely associated with the campaign you are running.
Click the field that most closely corresponds to when you plan to make your first ads purchase.
When your information is entered correctly, click "Create."
Step 7: Account Approval
Once your information is entered, your account will be submitted to the Turn It Blue team for approval. Our team will confirm that you aren't a Russian robot or a Republican, and you will get a notification your account has been approved.
Keep an eye on your inbox for the next 24 hours to receive a confirmation email from our team. Once your account is confirmed, you can begin running ads!